Last Updated on December 26, 2021
Citrix ADC VPX Express in Azure (or on-premises) is a FREE licensed version of Citrix ADC that allows 20 Mbps bandwidth, 20 Mbps of SSL throughput and maximum of 250 SSL sessions. It comes with All ADC standard license features, except Citrix Gateway and L4 and L7 defenses.
You can upgrade the VPX Express License to the following two options:
- A standalone Citrix ADC VPX license
- Citrix ADC Pooled Capacity license for VPX instances.
One way to deploy Citrix ADC VPX Express in Azure is through a template published in GitHub repository. Visit citrix-adc-azure temples, scroll down and click Deploy to Azure. After logging-in to Azure, it should take you to a custom template deployment page. Fill up required fields and click Review + create.
This Azure custom template deploys the VPX in a single-NIC mode. The standard Citrix ADC IP addresses: NSIP (management IP), VIP (where load balanced applications are accessed) and SNIP (the IP used to send traffic to back-end instances) are all provisioned on the single NIC and are drawn from the address space of the provided virtual network’s subnet. The NSIP is mapped to the Public IP of the VPX Instance and the RFC1918 VIP is mapped to another public IP.

Alternatively, you can go to Azure Marketplace and set following filters. Click Citrix ADC 12.1 (or whichever version you like). I would prefer to go with a preferred solution. A preferred solution can be identified by a preferred solution badge next to the template name.
- Publisher Type: Partner
- Publisher name: Citrix
- Product Type: Virtual Machine
Select Citrix ADC 12.1 VPX Express – 20 Mbps from the plan drop down menu and click Create.

This templates also deploys Citrix ADC VPX Express in Azure in a single NIC mode with 1 private IP. If during the VM creation, you choose to create a public IP then a single NIC with 1 private and 1 public IP will be created. Once the VM is created, more IP configurations (comprising of public + private or private only) to be used as VIP and SNIP can be added to the NIC.
For the purpose of this demonstration, we will use another template. Go to Azure Market place and set following filters.
- Publisher Type: Partner
- Publisher name: Citrix
- Product Type: Azure Application
Click Citrix ADC VPX Express from the result. On the next page, click Create. Just like GitHub template, this template also creates a VPX instance with single NIC having 3 IPs that will be pre-configured with VIP and SNIPs.

On Basics tab, select a subscription, select an empty Resource group and a Region. If there is no empty Resource group then click Create new. Click Next : General Settings.

On General Settings tab, Provide a name to Citrix ADC VPX Express VM. Provide a username, a password and confirm the password. This is the username and password that you will use to login to ADC. The minimum VM instance size for Citrix ADC VPX is 2 vCPU and 2 GiB memory. Selected template is associated with Standard A2 v2 Azure VM instance (2 vCPUs, 4 GiB Ram and 20 GiB Standard HDD LRS Disk), which should be enough for Express edition. Click Next : Advanced Settings.

In Advanced Settings tab, click Create new in front of Virtual network. A new window shall open up. Provide a name or accept the default name. Delete the default *.*.*.*/16 address range unless you want the vNet to host 65536 IP address. If deleted, provide a shorter address range.
When you delete the vNet address range, the default subnet address range also gets automatically deleted. If so, provide a subnet address range. Make sure it is contained within the vNet address space.
Click OK.

Click Create new in front of Storage Account Settings. A new window shall open up. This storage account will be used for storing Boot diagnostics logs, metrics and serial console screenshots. Provide a name to the storage account. General purpose v1 is a legacy storage account type but good enough for Express edition.
Standard performance tier is backed by magnetic drives with lowest cost per GB. It is good for bulk storage and infrequent access whereas premium storage uses SSDs. Locally redundant storage (LRS) copies the data synchronously three times within a single physical location in the primary region. Boot diagnostics does not support premium storage accounts or zone redundant storage accounts (ZRS). If either of these are used for boot diagnostics users will receive an StorageAccountTypeNotSupported error when starting the VM.
Click OK.

By default, the Publishing Monitoring Metrics option is set to false. If you want to enable this option, select true from drop down. Create an Azure Active Directory (ADD) application and service principal that can access resources. Assign contributor role to the newly created AAD application. This is explained later in this article. Click Next : Review + create.

Once the validation is completed, click Create.

It took around 4 minutes to complete. Pre-configured templates make it so easy to deploy Citrix ADC VPX Express in Azure. Expand Deployment Details to see all the components that this template created. Click Go to Resource group.

Click the Network Interface (ns-vpx-express-nic1 in my case).

Click IP Configurations. Notice that template has already configured 3 IP configuration for NSIP, VIP and SNIP on the NIC. 3rd IP config for SNIP doesn’t have any public IP associated to it.

Go back to the resource group and click Network security group (ns-vpx-express-nic1-nsg in my case). The template adds two inbound security rules for port 443 and 22. Feel free to delete port 22 rule as Azure recommends using managed key-pair for SSH connections.

Let’s access Citrix ADC VPX Express in Azure by using its Public NSIP. It should open up fine.

Also try accessing ADC for management purpose using Private NSIP from a VM which is either in same vNet as ADC or in a peered vNet.

After login, if you happen to land on Set Credentials page where it asks for Tenant ID, Application ID and Application Secret, click Skip or Cancel for now, whichever option you see.
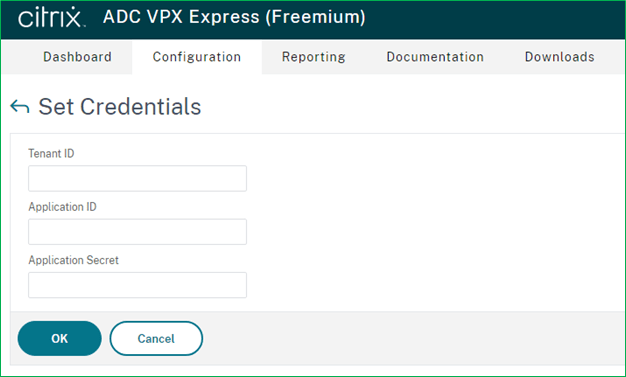
The Set Credential page appears when the application ID and API access key are not set or the correct application ID and API access keys (same as application secret) is not set in the Azure portal. Application ID and API access key (or Application secret) appear during Citrix ADC VPX standalone deployment wizard if you set Public Monitoring Metrics to true, and in HA deployment, when Backend Autoscaleoption is set to Enabled or when Azure Monitoring Metrics is set to Enabled.
If you clicked Skip/Cancel then below screen will appear.

Click on the gear icon to at the top right corner just beneath the username. After clicking on continue you can start configuring your NetScaler.

If you set Publish Monitoring Metrics to true in Advanced Settings tab of this template then you have to provide an application ID and secret (similar to API access key). For that you need to create an Azure Active Directory Application.

Go to Azure Active Directory, click App registrations and then click + New Registration.

Provide a name to the application, select Accounts in this organizational directory only (Default Directory only – Single tenant) and then click Register.

Once created, you will be taken to the Overview page. Copy Application (client) ID in a notepad. In front of Client Credentials, click Add a certificate or secret.

Under Client Secrets click New client secret. A window shall open up. Provide a name and expiration duration. Click Add.

Copy the Secret Value in a notepad where you copied the application ID.

When you register an application through the Azure portal, an application object and service principal are automatically created in your home directory or tenant.
An application object is used as a template or blueprint to create one or more service principal objects. A service principal is created in every tenant where the application is used.
To access resources that are secured by an Azure AD tenant, the entity that requires access must be represented by a security principal. This requirement is true for both users (user principal) and applications (service principal). The security principal defines the access policy and permissions for the user/application in the Azure AD tenant.
The application object is the global representation of your application for use across all tenants, and the service principal is the local representation for use in a specific tenant. The application object serves as the template from which common and default properties are derived for use in creating corresponding service principal objects.
For more reading visit relationship between application objects and service principals.
In Azure Active Directory, click Enterprise Applications to see the automatically created service principal.

Go to the resource group and click Access control (IAM) then click + Add and select Add role assignment.

Select the Contributor role and click Next.

Make sure User, group, or service principal is selected in Assign access to. Click + Select members. Search the newly created service principal, select it and click Select.

Now click Review + assign.

Paste the application ID and API access key (Client secret value) in respective fields in the advanced tab of the template.
Now, after first login to Citrix ADC, Set Credentials page should not show up.
Be the first to reply